
VOICEVOX Open API の音声合成用クエリから VTubeStudio とのリップシンクを行うサンプルを作ってみました。

※リップシンク: 音声に合わせて口パクさせること
実行結果だけ先に貼ります(動画)
キャラ: Live2D 桃瀬ひより
ボイス: VOICEVOX 雨晴ハウ
概要
VOICEVOX Open API の /audio_query にリクエストを投げると次のようなレスポンスが返ってきます。
{
  "accent_phrases": [
    {
      "moras": [
        {
          "text": "コ",
          "consonant": "k",
          "consonant_length": 0.10002632439136505,
          "vowel": "o",
          "vowel_length": 0.15740256011486053,
          "pitch": 5.7169013023376465
        },
        {
          "text": "ン",
          "consonant": null,
          "consonant_length": null,
          "vowel": "N",
          "vowel_length": 0.08265873789787292,
          "pitch": 5.879570007324219
        },
        {
          "text": "ニ",
          "consonant": "n",
          "consonant_length": 0.03657080978155136,
          "vowel": "i",
          "vowel_length": 0.11745765060186386,
          "pitch": 5.982304096221924
        },
        {
          "text": "チ",
          "consonant": "ch",
          "consonant_length": 0.08906148374080658,
          "vowel": "i",
          "vowel_length": 0.0850156843662262,
          "pitch": 5.971700191497803
        },
        {
          "text": "ワ",
          "consonant": "w",
          "consonant_length": 0.07749883085489273,
          "vowel": "a",
          "vowel_length": 0.1923869103193283,
          "pitch": 5.954050540924072
        }
      ],
      "accent": 5,
      "pause_mora": {
        "text": "、",
        "consonant": null,
        "consonant_length": null,
        "vowel": "pau",
        "vowel_length": 0.39703789353370667,
        "pitch": 0.0
      },
      "is_interrogative": false
    },
    {
      "moras": [
        {
          "text": "ズ",
          "consonant": "z",
          "consonant_length": 0.13417840003967285,
          "vowel": "u",
          "vowel_length": 0.12878121435642242,
          "pitch": 5.857631683349609
        },
        {
          "text": "ン",
          "consonant": null,
          "consonant_length": null,
          "vowel": "N",
          "vowel_length": 0.0994134470820427,
          "pitch": 6.220222473144531
        },
        {
          "text": "ダ",
          "consonant": "d",
          "consonant_length": 0.04122621566057205,
          "vowel": "a",
          "vowel_length": 0.11730614304542542,
          "pitch": 6.214175224304199
        },
        {
          "text": "モ",
          "consonant": "m",
          "consonant_length": 0.07889395952224731,
          "vowel": "o",
          "vowel_length": 0.12593254446983337,
          "pitch": 6.0423583984375
        },
        {
          "text": "ン",
          "consonant": null,
          "consonant_length": null,
          "vowel": "N",
          "vowel_length": 0.07154091447591782,
          "pitch": 5.838229656219482
        },
        {
          "text": "ナ",
          "consonant": "n",
          "consonant_length": 0.03893312066793442,
          "vowel": "a",
          "vowel_length": 0.09891440719366074,
          "pitch": 5.660234451293945
        }
      ],
      "accent": 1,
      "pause_mora": null,
      "is_interrogative": false
    },
    {
      "moras": [
        {
          "text": "ノ",
          "consonant": "n",
          "consonant_length": 0.05455999821424484,
          "vowel": "o",
          "vowel_length": 0.11028919368982315,
          "pitch": 5.620979309082031
        },
        {
          "text": "ダ",
          "consonant": "d",
          "consonant_length": 0.0543314591050148,
          "vowel": "a",
          "vowel_length": 0.23543624579906464,
          "pitch": 5.696633338928223
        }
      ],
      "accent": 2,
      "pause_mora": null,
      "is_interrogative": false
    }
  ],
  "speedScale": 1.0,
  "pitchScale": 0.0,
  "intonationScale": 1.0,
  "volumeScale": 1.0,
  "prePhonemeLength": 0.1,
  "postPhonemeLength": 0.1,
  "pauseLength": null,
  "pauseLengthScale": 1.0,
  "outputSamplingRate": 24000,
  "outputStereo": false,
  "kana": "コンニチワ'、ズ'ンダモンナ/ノダ'"
}
この中の moras には、各音素の情報が含まれています。
text: 文字consonant: 子音consonant_length: 子音の長さ(秒)vowel: 母音(a, i, u, e, o) または休符(pau)vowel_length: 母音の長さ(秒)pitch: ピッチ
このデータを基にVTubeStudio APIから口の動きを制御し、リップシンクを行います。
実行環境
- Windows 11
- Python 3.11.9
実装
コードと説明を以下に示します。
vts_client.py
VTubeStudio API 使用するには、
- WebSocket接続(connect)
- トークン取得(request_token)
- トークン認証(authenticate)
という手順が必要です。
また、トークン認証時にはVTubeStudioの画面で認証を行う必要があります。
class VTSClient:
    def __init__(self, plugin_name, plugin_developer, ws_url):
        self.plugin_name = plugin_name
        self.plugin_developer = plugin_developer
        self.ws_url = ws_url
        self.websocket_session = None
        self.authenticated_token = None

    async def connect(self):
        self.websocket_session = await websockets.connect(self.ws_url)
        token = await self.load_token()
        if token is None:
            token = await self.request_token()

        authenticated = await self.authenticate(token)
        if not authenticated:
            print("VTubeStudio authentication failed", file=sys.stderr)
            await self.websocket_session.close()
            await self.shutdown_server()
            sys.exit(1)
        else:
            print("VTubeStudio authentication successful")

        self.authenticated_token = token
        await self.save_token()

    async def disconnect(self):
        if self.websocket_session:
            await self.websocket_session.close()

    async def request_token(self):
        request = {
            "apiName": "VTubeStudioPublicAPI",
            "apiVersion": "1.0",
            "requestID": "TokenRequestID",
            "messageType": "AuthenticationTokenRequest",
            "data": {
                "pluginName": self.plugin_name,
                "pluginDeveloper": self.plugin_developer
            }
        }
        await self.websocket_session.send(json.dumps(request))
        response = await self.websocket_session.recv()
        return json.loads(response)["data"]["authenticationToken"]

    async def authenticate(self, token):
        request = {
            "apiName": "VTubeStudioPublicAPI",
            "apiVersion": "1.0",
            "requestID": "AuthenticationRequestID",
            "messageType": "AuthenticationRequest",
            "data": {
                "pluginName": self.plugin_name,
                "pluginDeveloper": self.plugin_developer,
                "authenticationToken": token
            }
        }
        await self.websocket_session.send(json.dumps(request))
        response = await self.websocket_session.recv()
        return json.loads(response)["data"]["authenticated"]
lipsync_controller.py
moras に含まれる情報を元に、口の動きを作ります。
VTubeStudio API側で制御するパラメータは MouthOpen と MouthSmile です。
MouthOpenは口を開閉するパラメータで、0.0 が閉じた状態、1.0 が開いた状態です。MouthSmileは口角を上げるパラメータで、0.0 が無表情、1.0 が笑顔です。- ※
ParamA/I/U/E/O/Silenceが使えるLive2Dモデルであれば、そちらを使ったほうが良いと思います。
InjectParameterRequest メッセージを送信することで、口の動きを制御します。
# VTubeStudio標準搭載のモデルは ParamA/I/U/E/O/ParamSilence が使用できないため、
# MouthOpen と MouthSmile のみを使用
class LipsyncController:
    async def control_mouth(self, websocket, mouth_open: float, mouth_smile: float):
        request = {
            "apiName": "VTubeStudioPublicAPI",
            "apiVersion": "1.0",
            "requestID": "InjectParameterRequest",
            "messageType": "InjectParameterDataRequest",
            "data": {
                "mode": "set",
                "parameterValues": [
                    {
                        "id": "MouthOpen",
                        "value": mouth_open
                    },
                    {
                        "id": "MouthSmile",
                        "value": mouth_smile
                    }
                ]
            }
        }
        await websocket.send(json.dumps(request))
        await websocket.recv()

    async def lipsync(self, websocket, moras: List[dict]):
        # 母音に応じた口の形のマッピング
        vowel_to_mouth = {
            "a": (1.0, 1.0),
            "i": (0.2, 1.0),
            "u": (0.2, 0.2),
            "e": (0.5, 0.8),
            "o": (0.5, 0.3),
            "N": (0.0, 0.5),
            "pau": (0.0, 0.5)
        }
        # 遅延時間(API呼び出し時間やその他の遅延を考慮)
        delay_time = 0.0
        # 処理にかかった時間を計測
        prev_time = asyncio.get_event_loop().time()

        # 口の動きの制御
        for mora in moras:
            vowel = mora["vowel"]
            vowel_length = mora["vowel_length"] or 0.0
            consonant_length = mora["consonant_length"] or 0.0

            # 母音に応じて口の形を調整
            mouth_open_value, mouth_smile_value = vowel_to_mouth.get(vowel, (0.0, 0.0))

            # API呼び出し
            await self.control_mouth(websocket, mouth_open_value, mouth_smile_value)

            # 処理にかかった時間を計測
            time_1 = asyncio.get_event_loop().time()
            processing_time = time_1 - prev_time

            # 次の音素までの待機時間を計算
            wait_time = vowel_length + consonant_length - processing_time - delay_time

            # 次の音素までの待機時間が正の場合は待機
            if wait_time > 0:
                await asyncio.sleep(wait_time)
                # スリープ誤差を考慮して遅延時間を計算し、次の音素の待機時間を調整
                time_2 = asyncio.get_event_loop().time()
                delay_time = time_2 - time_1 - wait_time
            else:
                # 待機時間が負の場合は遅延時間に代入し、次の音素の待機時間を調整
                delay_time = -wait_time

            # 処理にかかった時間を計測
            prev_time = asyncio.get_event_loop().time()

        # 口を閉じる
        await self.control_mouth(websocket, 0.0, 0.5)
voicevox_client.py
VOICEVOX Open API へのリクエストは次のような流れになります。
/audio_queryにテキストと話者IDを送信して音声合成用のクエリを作成- 1.で作成したクエリを
/synthesisに送信して音声データを取得
/audio_query からのレスポンスには今回欲しい情報(moras) が含まれています。
class VoicevoxClient:
    def __init__(self, api_url):
        self.api_url = api_url

    async def create_audio_query(self, text: str, speaker: int):
        async with httpx.AsyncClient() as client:
            response = await client.post(
                f"{self.api_url}/audio_query",
                params={"text": text, "speaker": speaker}
            )
            response.raise_for_status()
            return response.json()

    async def synthesize_audio(self, query_data: dict, speaker: int):
        async with httpx.AsyncClient() as client:
            response = await client.post(
                f"{self.api_url}/synthesis",
                params={"speaker": speaker},
                json=query_data
            )
            response.raise_for_status()
            audio_data = response.content
            audio_format = response.headers.get("Content-Type", "audio/wav").split("/")[-1]
            return audio_data, audio_format
extract_moras.py
accent_phrase["moras"]とaccent_phrase["pause_mora"]を1次元配列に配置して返します。
def extract_moras(query_data: dict):
    moras = []
    pre_phoneme_pau_mora = create_pau_mora(query_data["prePhonemeLength"])
    post_phoneme_pau_mora = create_pau_mora(query_data["postPhonemeLength"])
    moras += [pre_phoneme_pau_mora] + [mora for accent_phrase in query_data["accent_phrases"]
                for mora in (accent_phrase["moras"] + ([accent_phrase["pause_mora"]] if accent_phrase["pause_mora"] else []))] + [post_phoneme_pau_mora]
    return moras
セットアップ
リポジトリをクローンし、venvの作成と必要パッケージのインストールを行います。
git clone https://github.com/oaiwej/vvvtslipsync.git
cd vvvtslipsync
py -3.11 -m venv venv
venv\Scripts\Activate.ps1
pip install -r requirements.txt
実行
※先にVOICEVOXとVTubeStudioを起動しておいてください。
以下のコマンドでサーバを起動します。
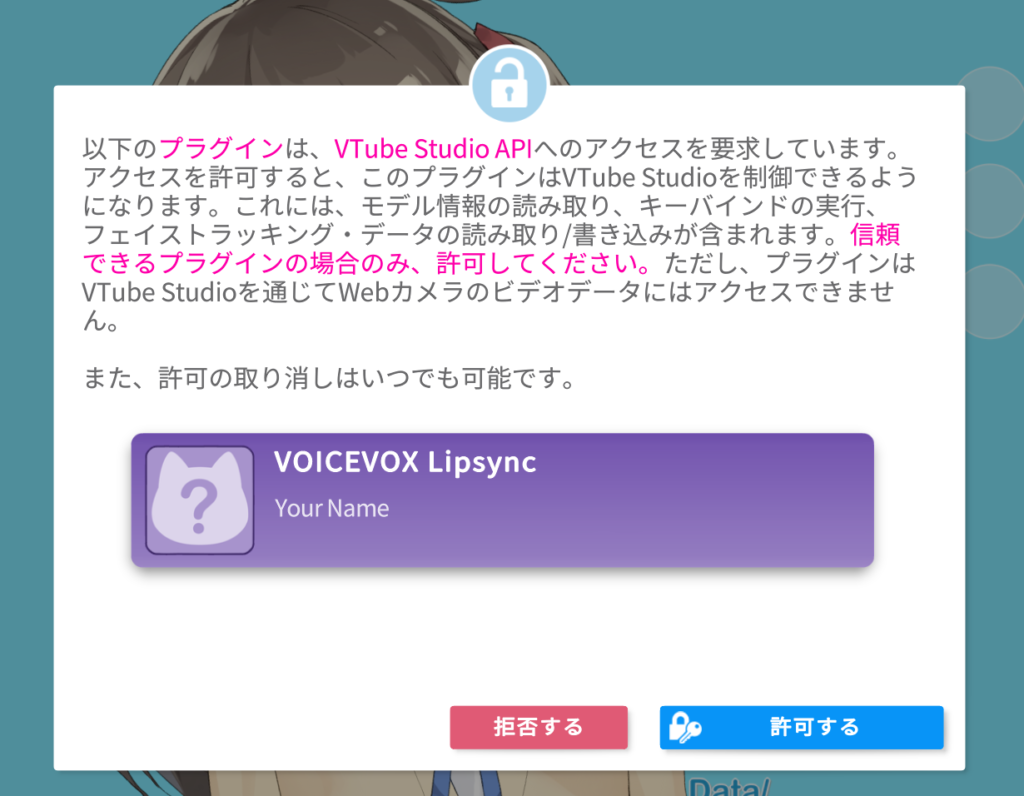
python -m vvvtslipsyncうまく行けば、VTubeStudioの画面にアクセス要求のポップアップが表示されるはずなので「許可する」をクリックしておいてください。
次に、別の窓からcurlコマンドでリクエストを送信してみます。レスポンス(.wav)を再生。
curl -X POST "http://localhost:8000/speak" -H "Content-Type: application/json" -d '{"text": "こんにちは。VOICEVOXとブイチューブスタジオのリップシンク連携テストをしています。口の動きは合っていますか?声とズレていたりしないでしょうか?", "speaker_id": 10 }' --output '.\test.wav'; (New-Object System.Media.SoundPlayer (Get-Item '.\test.wav')).PlaySync();音声再生とリップシンクができていれば成功です。
まとめ
以上、VOICEVOXの音声合成用クエリからVTubeStudioのリップシンクを行うことが出来ました。
他にもVTubeStudioのリップシンクを行う方法として仮想オーディオミキサーを使用する方法もあったのですが、余計なドライバなどを入れたくなかったので今回の方法を選びました。
そのうちLLMと連携して喋らせてみたいと思っています。

コメント